Game Description
Tips on the transporting the Gnome.
The Gnome can be a pain transport in some places. Here I will walk you through the best way to transport it based on my experience. The ultimate goal is to place it in the rocket at the beginning of Chapter 6.
Credit for the images used here goes to now defunct nextgenwalkthroughs.com as I took snapshots from their videos.
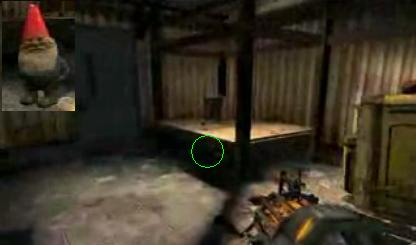
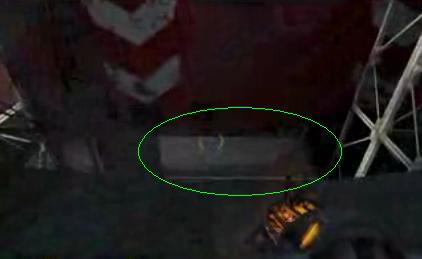
The Gnome is found the communications shack at the starting of the game. In the picture below, the image in the upper left shows what the Gnome looks like and the green circle indicates where its located.
As you play through Chapter 1, you will have to carry it around with the gravity gun. At the end of Chapter 1 you will have to drop down a hole and Chapter 2 will start.
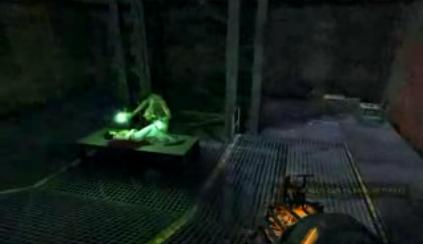
You will arrive to a place where a vertigaunt is attempting to save Alyx. Immediately go to the back in the right corner and place the Gnome there.
After fighting off the antlions, you will have to leave to get the extract to save Alyx. Your Gnome will be quite safe here and will be in the corner where you left it when you get back. I recommend you do a manual save here before you leave to get the extract.
When you get back with extract, the vertigaunt will heal Alyx. Pick up the Gnome and continue to transport it. Once outside, Chapter 3, Freeman Pontifex, will start. Proceed until you get to the point where you have the fight the antilion guards. Place the Gnome is a corner somewhere safe and do a save. When you've defeated the guards you'll need to bring the elevator down. Hop out of the elevator and grab the Gnome and get back on the elevator.
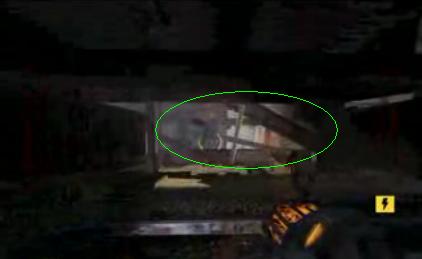
Shortly after you will arrive to an area with a terminal/monitor and will be told about getting a car. Place the Gnome in somewhere near the green line in the picture below. The key is that it need to be very close to the door/gate. The reason will be obvious later.
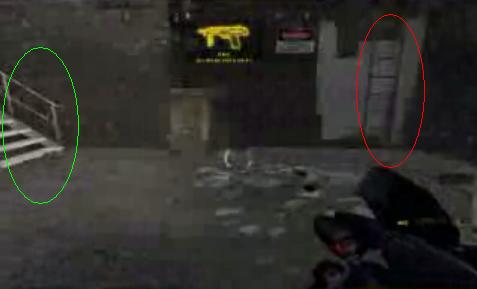
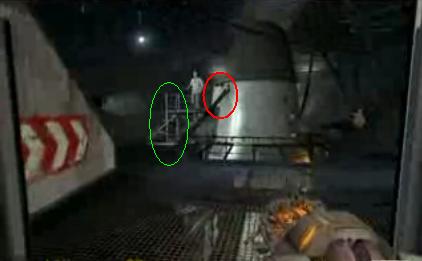
Go get the car. When you arrive back you will need to flip a switch to let Alyx and the vertigaunt out of the area above. Using the image below, you will have to climb the ladder in the red circle to get to the room with the switch. Flip to switch to release door and quickly head back down and ascend the stair on the green circle. The grab the gnome which is right by the door where you left it. Do a save before you flip the switch. It might take several attempts to get there in time. Don't climb back down the ladder - jump down instead and it will save you some time. Running instead of walking will obviously save time too.
Once you have the gnome, place it in the car and drive very slowly through the tunnel. Keep checking to make sure it didn't fall out of the car. Transporting the gnome from this point on will be challenging. The gnome does not like car rides and it will, quite often, fall out of the car.
Chapter 4, Riding Shotgun will commence. You will want to hop out of the car and grab the gnome and run it for a while then drop it or throw it somewhere. Head back to the car and catch up with the gnome. Repeat this process until you get to your destination. From this point on this is how the gnome should be transported. At first glance this might appear foolish but the wisdom of this technique will quickly become apparent if you attempt to use the car as the sole transport mechanism.
You will arrive at the point where you have to fight a few hunters. Place the Gnome in a safe spot then dispense of them and proceed to the next area with the Gnome. Here is where it becomes challenging as you will have to deal with the chopper. Clear the area so that the only thing you have to deal with is the chopper. Stock up on health and whatever else you need and do a save. Leave the Gnome here for the time being and head up the road and get rid of the zombies by the train track by running them over. Now head back where you left the Gnome and replenish your health if possible. If you can't get your health above 75%, reload and try again. Once you have above 75%, do another save which I'll refer to as save point A. Don't ever overwrite save point A. This is going to be your security blanket.
Now the tough part begins because that chopper will make things miserable for you. You'll want to grab the Gnome and throw it as far as you can then hop in the car and move forward. Repeat this process and start saving alot as you move forward and only if you have a decent amount of health. This will take several attempts to be successful. Continue this process until you get to your destination where you will have to ram your car into the gate to get in. Now take the Gnome and drop it down the hole illustrated in the image below. and do another save. Its now safe to overwrite save point A.
Once you drop down the hole, you will need to move through the opening ahead of you as depicted in the image below.
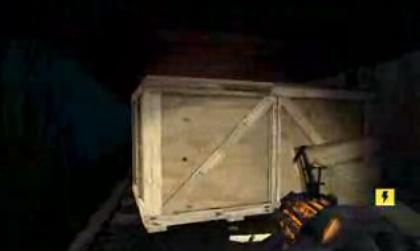
Take the Gnome through that opening and continue until you see the big box as shown below. You can leave the Gnome anywhere there. That area is a safe area and you will be able to come back there to pick up the Gnome after you defeat the chopper.
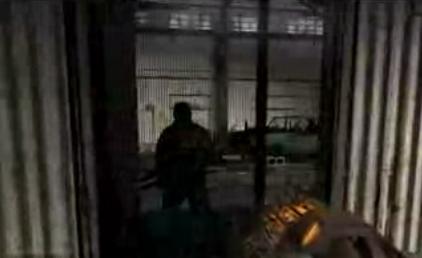
Now that you've defeated the chopper, pick you the Gnome and head into the building. You will come to a workshop where you will see a guy working on a car. Place the Gnome anywere in that area. I prefer leaving it next to garage door but anywhere in there is safe.
Now continue through the level and do what you have to do. Once done, you will come back to the workshop and be given your repaired car back. Grab the Gnome an continue through the level. Transporting the Gnome has now become easier. You should know what to do by now.
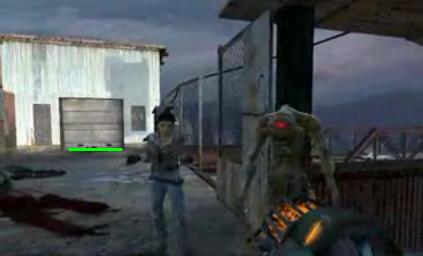
You will eventually come to a point where you and Alyx meet up with DOG. If you want to beat DOG in a race you can leave the Gnome there a do a save then beat DOG in the race and reload your save and proceed.
Once you've arrived at the base, Chapter 6 commences. Take the Gnome everywhere with you. You, Alyx, and her dad will take an elevator to meet some guy next to a rocket. Go up the steps in the green circle and place it in the hatch in the red circle and hit the X button to close the hatch. Once the hatch is closed, the achievement will unlock.
Back to the main Orange Box page
Report a broken link